This is what you will need:
Your embroidered piece
A hoop which will fit your embroidery
Felt in the same colour as your embroidered cloth (or as close as possible)
Heavy card stock. I used acid free watercolour paper
Glue that dries clear. I used a gel glue, which worked really well
Embroidery thread in the same colour as your cloth + needle
Scissors
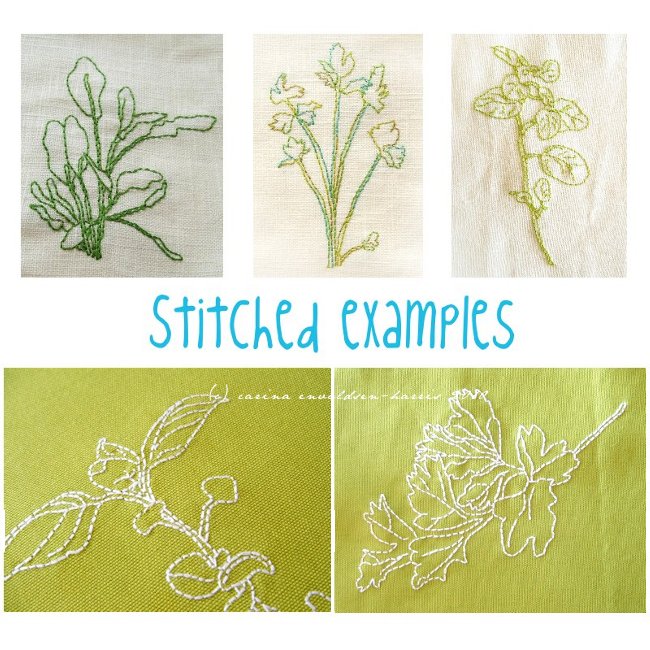
The embroideries in the hoops are my designs Tree of Life and Happyscape Spring
Cut a circle of felt and one of the card stock, they should be the size of the inside of the inner hoop.
Put your cloth on top of the inner hoop and move it around until it is perfectly positioned. Then slide the outer hoop on top.
Remove both hoops and now you have an imprint of how to position the cloth. This is handy, because depending on the glue you are using you will probably have to be quick once you have applied the glue to the hoops.
Which is the next step. No picture of that (sorry), but there was no time what with the glue drying and stuff.
This is what you do: apply glue to the outside of the inner hoop, then place your cloth on top, using the imprint as a guide. Then apply glue to the inside of the outer hoop and slide it in place over the cloth and inner hoop. Tighten the screw slightly and then pull the cloth taut as you go around the hoop. Once the cloth is evenly taut, tighten the screw properly.
Your cloth and hoop combo should now look something like this.
Your cloth is hopefully quite a bit wider than the hoop, if it isn't you may be slightly buggered. Anyway. Cut the cloth into a circle that is about 5cm/2" wider than the hoop.
Then place the felt circle inside the hoop. There is no need to sew or glue it into place. It is there to protect the stitches and make everything look neat. Especially if your cloth is light.
Now thread your needle with a length of thread that is the size of the circumference of the hoop + 15cm/6". Gather the edge like you would if you were making a yoyo. You want the stitches to be as even as you can and also quite close together, so you get a neat end result.
Which hopefully looks something like this. Pull the thread tight and finish by making a couple of knots in the fabric. The thread/fabric should be so tight that the fabric 'hovers' slightly in the middle, not touching the felt.
Now apply glue to your card stock, be quite generous, but not to the point of soaking the card stock! Also apply some glue to the fabric. Not a lot, just enough to add a bit of extra bonding with the card stock.
Place the card circle in the hoop and press it down firmly all over.
Place something heavy on top. Preferably something that has a flat bottom and covers most of the inside of the hoop. Leave like this for about half an hour, then remove the heavy weight and leave to dry completely.
My set up here is not quite ideal, would have been better if the diameter had been a bit wider. But hey, you work with what you've got, eh?
Tie a nice piece of ribbon or string to the closure of the hoop and hang on your wall.
Additional-
If you want to be able to remove your embroidered cloth from the hoop at some point, skip any steps to do with glue. In stead of finishing it off with card stock, you can stitch a second felt circle onto the 'yoyo' of the back.
Also, it may be a good idea to wrap the inner hoop in fabric strips like bias binding or similar, which will protect the cloth from wear to some extent. It will add bulk to the ensemble, though.