Showing posts with label embroidery. Show all posts

Thursday, June 20, 2013

New in the shop: Maybroidery collection

Maybroidery collection in the shop
I stitched (almost) every single day in May! Yay! I think I missed 4 days in total - not bad! It was a really nice project to have. I think I'll do it again! If you ever want to do something similar I have a tip to make it easier - especially at the beginning. Cut out pieces of fabric to stitch on for a few days at a time. It's amazing how cutting a bit of fabric can seem like a chore - and an excuse to not stitch! So cut fabric ahead of time!

♥ Maybroidery motif collection ♥
I had no plans to make these stitcheries into patterns but I've had queries to do just that, so here they are! There are 20 motifs in all - they are quite small. They fit in a 4" embroidery hoop. Some of them are quite simple to do and most of them use stitches you're probably familiar with already. They all take less than 2 hours to stitch, a lot of them around an hour. Perfect for a bit of stitching at the weekend. or indeed if you want to do your own daily project. :-)

So here is the Maybroidery collection in the shop. And until Saturday you can get it for just $5.00 (that's almost half price!) with this code: TAKEFIVE

Wednesday, August 31, 2011

A ghostly preview

Ironing embroidery, imprinted on ironing board
I've got a couple of new embroidery patterns in the works - this is one of them. Kinda. Because it's fairly obvious that there's not a single stitch to be seen right here! I was ironing the stitched pattern and this cool imprint happened.

This pattern is kinda inspired by my Happyscape pattern, but the colours I've used are really different! Which I'll hopefully be able to show you early next week. :-)


Tuesday, August 10, 2010

Let's talk satin stitch

Let's talk about the satin stitch. I really like this stitch; I am not completely sure why because you have to be fairly patient to stitch it and it uses quite a lot of thread. Which kinda bothers me. So sometimes I use the Lazy Satin stitch instead.

But let's get on with the proper satin stich. Oh and this may get a wee bit controversial...

You can draw your shape so you have a guide to stitch from. Or you can use a single strand of 6-strand cotton to 'sketch' where to do your stitching, but do cover those stitches or remove them afterwards.

In all the satin stitching I have done, I have found that starting at the widest part of the shape makes for the best result. For example, a circle, start in the middle and then work the sides, one at a time.
When you are working a curvy shape like a circle, you will be stitching in steps. Each stitch is separated from the next by one thread in the fabric you are working on.

Think of your fabric like a grid. In the example of the circle, you work a few stitches on the same 'line' in the middle part. Then, as you move towards the sides you move down one AND one to the right (or left) and so on. Sometimes a circle looks more even if you do [middle part] then 1 down and 1 to the right, then another stitch on the same 'line' and then start doing the 1 down, 1 right.

Usually you don't need to go all the way to each side with the stitches. The eye will still see it as a circle! Take a look at the drawing above, the large circle looks quite rough, but seen from a distance you don't notice.

In this example maybe you can see how the stitches are done? You may have to click on the image to see it larger. The finer your fabric the easier it is to get a smooth result on a curved shape.

Satin stitch in itself is raised above the surface, but if you fancy giving it a bit more oomph(!), you can fill in the shape with straight stitches first, then do your satin stitching on top.

Now. This is where it may become a bit controversial. These are not satin stitches. Or not proper ones, anyway. And don't believe anyone who tells you differently.

I know satin stitches can be a bit tricky to work and maybe you think it looks horribly uneven at the edges. And you may be tempted to stitch around the edges to cover up the roughness. As I have in this image. But I urge you to fight this temptation with everything you've got!

It is not very elegant.. If you are worried about your shape looking rough, remember this: while you are working on your satin stitching, you are probably really close to it (certainly if you're near-sighted like me!) and every little 'mistake' will look horribly large.

But from a distance you will not be able to see all that- you will only see your satin stitched shape. So don't succumb to the cover-up stitches, ok!

However, I do sometimes do stitches like those three. But I don't think of them as satin stitch. They look kinda like set jewels, so I think of them as 'jewel stitch'.

Tuesday, June 15, 2010

Stitching Borders and Beyond embroidery ebook

Hello!

I am really (Really REALLY) excited to tell you about this:

I made another ebook. With more embroidery! Yes! Here, look! This is the frontpage:

Golly, it has been a long time in the making, but that is another story in itself! Let's talk about the book instead.

As you can probably tell, it is called Stitching Borders and Beyond. It had a few titles before that. Among them was 'Bob'. But it was suggested to me that that probably wasn't the best title.. ;-)

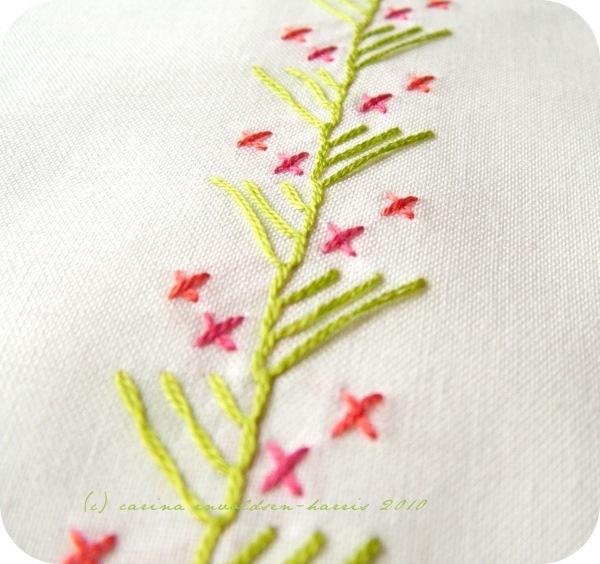
So, Bob Stitching Borders is a collection of 12 stitches, some are border-type stitches and a few are isolated stitches. I want more people to use these stitches instead of always defaulting to the usual suspects - I am guilty of this too! So much so that I used a few of them in the patterns in the ebook. Such is my addiction to French knot et al!

But the patterns!
Those are just some of them! There are 10 in all. And I gave them all titles, just because I could.

The book is available on Artfire and will be on Etsy too very soon. And it's an introductionary price too! $10.00 until July 15th!

Would you like to read a few more details about the book, see some more pictures and ohhhhh maybe download a taster of the book? Taster with instructions for the Maidenhair stitch which I have used in two of the above images, and the pattern for the one in the bottom picture! Then pop over to the book's page and have a look!

Sunday, June 13, 2010

Embroidery hoop framing tutorial

This is what you will need:
Your embroidered piece
A hoop which will fit your embroidery
Felt in the same colour as your embroidered cloth (or as close as possible)
Heavy card stock. I used acid free watercolour paper

Glue that dries clear. I used a gel glue, which worked really well
Embroidery thread in the same colour as your cloth + needle
Scissors

The embroideries in the hoops are my designs Tree of Life and Happyscape Spring

Cut a circle of felt and one of the card stock, they should be the size of the inside of the inner hoop.


Put your cloth on top of the inner hoop and move it around until it is perfectly positioned. Then slide the outer hoop on top.


Remove both hoops and now you have an imprint of how to position the cloth. This is handy, because depending on the glue you are using you will probably have to be quick once you  have applied the glue to the hoops.

Which is the next step. No picture of that (sorry), but there was no time what with the glue drying and stuff.

This is what you do: apply glue to the outside of the inner hoop, then place your cloth on top, using the imprint as a guide. Then apply glue to the inside of the outer hoop and slide it in place over the cloth and inner hoop. Tighten the screw slightly and then pull the cloth taut as you go around the hoop. Once the cloth is evenly taut, tighten the screw properly.


Your cloth and hoop combo should now look something like this.


Your cloth is hopefully quite a bit wider than the hoop, if it isn't you may be slightly buggered. Anyway. Cut the cloth into a circle that is about 5cm/2" wider than the hoop.

Then place the felt circle inside the hoop. There is no need to sew or glue it into place. It is there to protect the stitches and make everything look neat. Especially if your cloth is light.


Now thread your needle with a length of thread that is the size of the circumference of the hoop + 15cm/6". Gather the edge like you would if you were making a yoyo. You want the stitches to be as even as you can and also quite close together, so you get a neat end result.


Which hopefully looks something like this. Pull the thread tight and finish by making a couple of knots in the fabric. The thread/fabric should be so tight that the fabric 'hovers' slightly in the middle, not touching the felt.


Now apply glue to your card stock, be quite generous, but not to the point of soaking the card stock! Also apply some glue to the fabric. Not a lot, just enough to add a bit of extra bonding with the card stock.


Place the card circle in the hoop and press it down firmly all over.


Place something heavy on top. Preferably something that has a flat bottom and covers most of the inside of the hoop. Leave like this for about half an hour, then remove the heavy weight and leave to dry completely.

My set up here is not quite ideal, would have been better if the diameter had been a bit wider. But hey, you work with what you've got, eh?

Tie a nice piece of ribbon or string to the closure of the hoop and hang on your wall.

Additional-
If you want to be able to remove your embroidered cloth from the hoop at some point, skip any steps to do with glue. In stead of finishing it off with card stock, you can stitch a second felt circle onto the 'yoyo' of the back.

Also, it may be a good idea to wrap the inner hoop in fabric strips like bias binding or similar, which will protect the cloth from wear to some extent. It will add bulk to the ensemble,  though.